Introduction
Chromebook users often face issues with the auto click feature, which can be frustrating and impact overall productivity. Auto click is a built-in accessibility feature designed to assist users who have difficulty clicking the mouse. While it offers great convenience to some, it can be an annoyance to others. In this blog, we will guide you on how to disable the auto click feature on your Chromebook using top-rated apps and some handy tips.
Understanding Auto Click on Chromebooks
Auto click is a setting that initiates a click whenever the cursor stops moving for a few moments. It is intended to help individuals with motor impairments navigate their Chromebook without needing to perform manual clicks. This feature can be a boon for those who need it, yet it can be quite bothersome when it is turned on accidentally or if it no longer serves its purpose.
Chromebook’s auto click can lead to unintended actions, disrupting workflows and causing unnecessary frustration. To ensure a smoother user experience, it is crucial to understand how this feature works and the ways to manage or disable it as needed.
Why You Might Need to Disable Auto Click
While the auto click feature is instrumental for users requiring accessibility options, many find it to be more of a hindrance than a help. Here are a few reasons why disabling auto click may be beneficial:
-
Enhanced Control: Disabling auto click allows you to regain full manual control of your cursor, reducing the likelihood of unintended clicks.
-
Improved Productivity: Without the auto click feature, you can perform tasks more efficiently, as you won’t need to worry about unwanted clicks disrupting your workflow.
-
Reduced Frustration: Users who don’t need the accessibility feature may find the auto click quite annoying. Disabling it can lead to a more seamless and enjoyable computing experience.

Top Apps to Disable Auto Click on Chromebooks
Fortunately, there are several high-quality apps designed to help manage and disable the auto click feature on Chromebooks. Here’s a look at the best ones:
1. Accessibility Settings Manager
This handy app allows you to enable and disable various accessibility functions, including the auto click feature. It provides a straightforward interface to customize settings as per your needs.
2. Auto Clicker – Automatic Tap
Although primarily used to create automatic taps, this app also offers the functionality to disable auto click features effectively. It’s user-friendly and versatile enough to serve multiple purposes.
3. ClickOff
ClickOff is another useful application that helps manage secondary clicks and auto click functions. It is specifically designed for individuals looking to enhance their control over cursor clicks.
4. Disable Auto Click
As the name implies, this app focuses on disabling the auto click feature in just a few simple steps, making it an ideal choice for those looking for a straightforward solution.
Setting Up and Using Auto Click Management Apps
To ensure these apps serve their purpose effectively, here’s a detailed guide on setting up and using them to manage auto click settings seamlessly:
Step-by-Step Guide to Installing the App
- Open the Google Play Store on your Chromebook.
- Search for your chosen app using keywords like ‘Disable Auto Click’.
- Install the app by clicking the ‘Install’ button and wait for the process to complete.
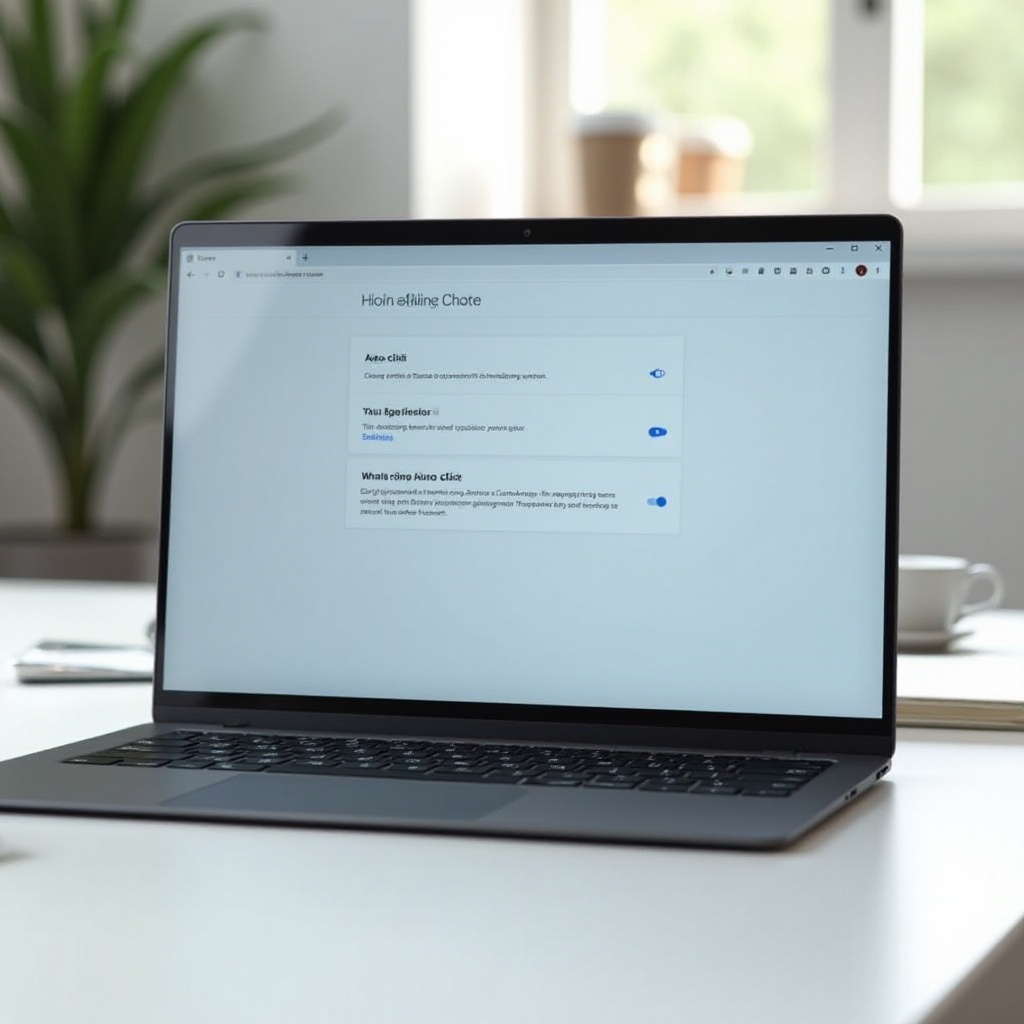
Configuring the App Settings
- Open the installed app from your Chromebook’s Applications menu.
- Navigate to the settings menu within the app.
- Locate the auto click settings and toggle the option to disable it.
- Save your changes and exit the app settings.
Troubleshooting Common Issues
If you encounter issues while using these apps, consider the following troubleshooting steps:
– Ensure app permissions are granted. Sometimes, the app may require special permissions, which need to be approved for optimal functioning.
– Restart your Chromebook to resolve temporary glitches.
– Update the app to the latest version for improved compatibility and bug fixes.
– Re-install the app if you continue facing problems. Sometimes, a fresh installation can resolve persistent issues.
Additional Tips for Enhancing Chromebook Performance
Disabling auto click is just one way to enhance your Chromebook’s performance. Here are additional tips to optimize your device:
- Regularly Update Your System: Ensuring your Chromebook’s software is up-to-date can improve performance and security.
- Clear Cache and Unnecessary Files: Regular maintenance like clearing cache and deleting unused files can free up system resources.
- Close Unused Tabs and Apps: Keeping unnecessary tabs and apps open can slow down your device. Closing these can enhance speed and efficiency.
Conclusion
Managing the auto click feature on your Chromebook can significantly improve your user experience. By understanding the purpose of auto click, knowing why you might need to disable it, and using effective apps to manage these settings, you can customize your Chromebook to suit your needs better. Remember to follow the steps for installing and configuring the apps, and don’t hesitate to troubleshoot any issues that arise. Enhancing your device’s performance through additional maintenance tips ensures a seamless and efficient Chromebook experience.
Frequently Asked Questions
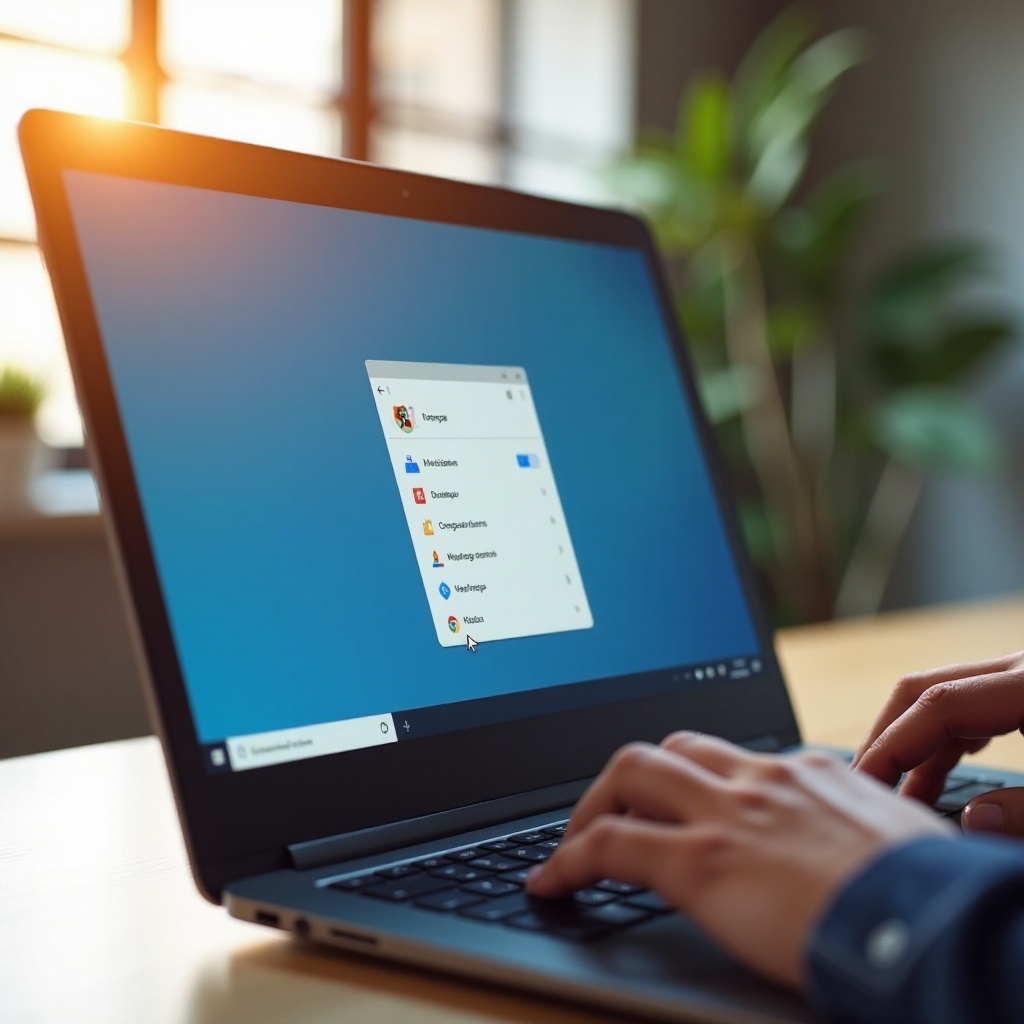
How do I disable auto click via Chromebook settings?
To disable auto click via Chromebook settings, access the Settings menu, navigate to Accessibility, and turn off the ‘Automatically click when the cursor stops’ option.
Are there free apps available to disable auto click on Chromebooks?
Yes, several free apps, such as Accessibility Settings Manager and Auto Clicker, are available on the Google Play Store to help manage the auto click feature on Chromebooks.
Can I re-enable auto click after disabling it?
Absolutely. You can re-enable the auto click feature by either revisiting the app settings you used to disable it or through the Chromebook’s Accessibility settings.